
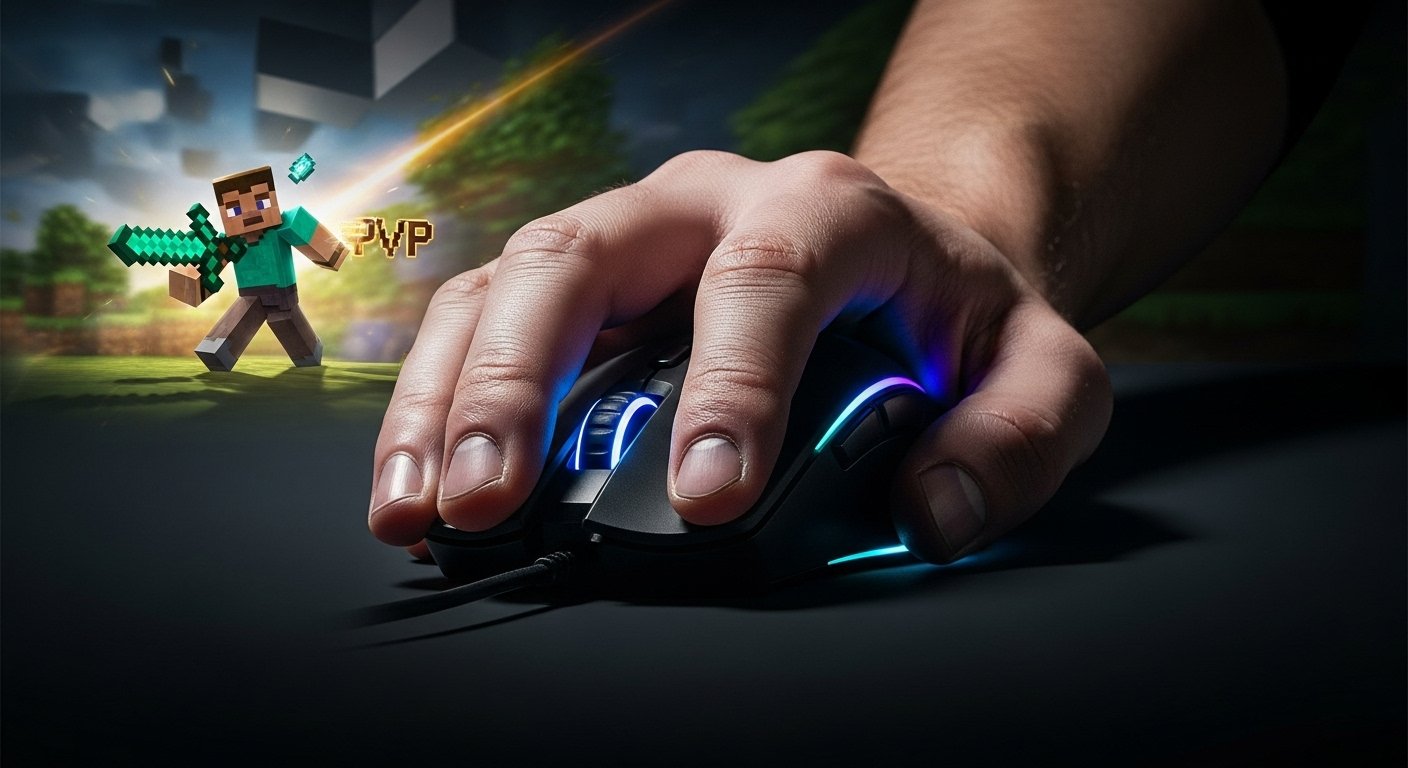
The screen flashes gray. You Died. Again. You can almost feel the smirk of the player on the other side. You had the better armor, the better position on the bridge, everything was perfect. But you heard it through your headset—that impossibly fast, buzzing sound of their clicks. It sounded like a hornet’s nest. Your own finger, desperately trying to keep up, felt like it was stuck in molasses. The fight was over before it even began, lost in a flurry of hits you couldn’t match. That feeling of frustration is infuriating. It’s a clear sign that your mechanical skill is the one thing holding you back from victory. But what if you could turn your hand into that same weapon? What if I told you that incredible speed isn’t a gift, but a skill you can learn, step-by-step? This guide will show you how.
This is not just another article about clicking fast. This is your complete training manual to master the art of jitter clicking, a powerful gaming skill that can give you a massive edge. We are going to walk you through a complete journey, taking you from a beginner struggling to get 6 Clicks Per Second (CPS) to an advanced player capable of hitting 12, 15, or even more.
Forget generic advice. Here, you will find a step-by-step process to create the controlled muscle vibration needed for this technique. We will cover the essential gear, including the right kind of gaming mouse that can handle high-speed clicks. More importantly, we’ll dive deep into the health and safety aspects that other guides dangerously ignore, teaching you the stretches and habits needed to avoid injury. You will learn specific training drills to build your muscle memory and a clear path to turn that raw speed into deadly accuracy. Before we begin, it’s a good idea to measure your starting point. You can check your current clicks per second with a simple online tool to set a baseline. By the end of this guide, you won’t just know how to jitter click; you will have a clear roadmap to becoming a faster, more accurate, and smarter player.
What is Jitter Clicking (And is it Right for You?)
Jitter clicking is a high-speed clicking technique where you tense the muscles in your arm and forearm to create a rapid vibration. This controlled shaking travels down your hand to your finger, allowing you to tap the mouse button far faster than you could with normal, deliberate clicks. It’s a method used by competitive gamers to gain an advantage in games that reward a high volume of clicks, like Minecraft PvP.
The Simple Science: How Tensing Your Muscles Creates Insane Speed

Think about how you normally click a mouse. You consciously decide to press down, your brain sends a signal, your muscle contracts, and you relax to lift your finger. This process has a natural speed limit.
Jitter clicking hacks that system. Instead of individual commands to “click,” you create one continuous command to “tense.” By flexing the muscles in your forearm and even your bicep, you induce a high-frequency spasm. Your finger, resting lightly on the mouse button, acts as a conduit for this vibration. It’s no longer about pushing the button over and over. It’s about letting the rapid shaking of your hand do the work for you. The result is a burst of clicks that sounds and feels almost like a machine.
The Brutal Truth: Who Should (and Shouldn’t) Learn to Jitter Click
Let me be perfectly honest: jitter clicking is not for everyone. It’s a specialized skill with a specific purpose, and forcing it can be a waste of time or even harmful.
You SHOULD learn to jitter click if:
- You are a competitive gamer in a click-intensive genre (like Minecraft, Roblox, or some FPS games).
- You have hit a plateau with your normal clicking speed and it’s holding you back.
- You are patient and willing to dedicate real time to practice drills.
- You have no prior history of wrist, arm, or hand pain.
You should probably AVOID jitter clicking if:
- You are a casual gamer who just wants to have fun. The potential strain isn’t worth the minor advantage.
- You have ever experienced Carpal Tunnel Syndrome, RSI, or tendonitis. Do not attempt this technique.
- The games you play require slow, precise mouse control above all else.
- You experience any pain or sharp discomfort when you try it. Pain is your body’s warning sign. Listen to it.
A Personal Confession: Why I Almost Gave Up on Jitter Clicking
When I first saw pro players jitter clicking, I was convinced it was the magic bullet I needed. I spent hours trying to replicate it. The result? A sore arm, terrible aim, and a CPS score that was barely higher than my regular clicking. I felt ridiculous. My whole arm would shake violently, my mouse cursor would fly all over the screen, and I’d miss every shot.
After about a week, I was ready to quit. I told myself, “My body just isn’t built for this.” But then I realized my mistake. I was trying to force it with brute strength, tensing every muscle as hard as I could. The real secret was control, not power. I learned to relax my grip and focus the vibration just in my forearm, letting it flow into my finger instead of shaking my whole setup. It was a huge breakthrough that turned a painful, clumsy mess into a controlled, deadly skill.
Your Pre-Flight Check: The Essential Gear for High CPS

You can have the best technique in the world, but if you’re fighting against your own equipment, you’ll never reach your full potential. Jitter clicking puts extreme demands on your gear, and a standard setup will quickly become the bottleneck that caps your speed. Think of it like trying to win a race with flat tires. Before we even start the training drills, we need to make sure your setup is ready for high performance.
Why Your Standard Office Mouse is Holding You Back (Debounce Delay Explained)
That basic mouse from your office or school is your first enemy. It was designed for browsing spreadsheets, not for high-speed gaming. The main culprit is something called “debounce delay.” In simple terms, when you click a mouse, the mechanical switch inside can physically bounce, which might accidentally register multiple clicks. To prevent this, manufacturers add a tiny, built-in delay to ignore these bounces.
For normal use, this is fine. For jitter clicking, it’s a disaster. You are trying to send signals faster than the delay can handle, causing many of your clicks to be completely ignored. A gaming mouse, on the other hand, is built with high-quality switches and firmware that allows for a very low (or even zero) debounce delay, ensuring every single vibration is registered as a click. You can often spot issues with a standard mouse by using a specialized double-click test; if it fails to register rapid inputs, it’s holding you back.
My Top 5 Recommended Gaming Mice for Jitter Clicking (With Pros & Cons)
There is no single “best” mouse, but some are engineered much better for this demanding technique. You’re looking for durable switches, a lightweight body, and a shape that supports a claw or fingertip grip. Here are a few top-tier options that pros rely on:
- Glorious Model O/D: Often called the lightweight champion. Its honeycomb design makes it incredibly light, which helps reduce fatigue during long jittering sessions. The stock cable is also so flexible it almost feels wireless. Its main drawback is that the holes can collect dust over time.
- Logitech G Pro X Superlight: The go-to choice for countless esports pros, and for good reason. It has a safe, comfortable shape, flawless wireless technology, and a top-tier sensor. It’s a fantastic all-around mouse, but it comes with a premium price tag.
- Razer Viper (and Mini version): A game-changer because of its optical switches. Unlike mechanical switches, these use a light beam to register clicks, making them insanely fast and eliminating any risk of double-clicking from wear and tear. The Mini is a fantastic, affordable option for those with smaller hands.
- Cooler Master MM710/MM711: Another excellent lightweight, honeycomb-style mouse. It’s known for its comfortable shape, especially for claw grippers, and offers amazing performance for its price point, making it a great entry into high-performance gear.
- Roccat Kone Pro: This mouse is famous for its ergonomic shape that fits the hand beautifully. Roccat’s “Titan” optical switches are also incredibly fast and satisfying to click, making it a strong contender for any click-intensive task.
I personally switched from a generic office mouse to a Glorious Model O, and my CPS instantly jumped by 2-3 points without any change in technique. The gear really does matter.
Beyond the Mouse: The Overlooked Importance of Your Mousepad and Posture
Your high-performance mouse needs a high-performance surface. A small, dirty, or hard plastic mousepad will sabotage your efforts. For jitter clicking, you need a large cloth mousepad (from brands like SteelSeries, HyperX, or ZOWIE). The smooth fabric surface provides a consistent glide that allows the small, rapid vibrations of your mouse to move freely without snagging.
Even more important is your posture. Sit up straight with your feet flat on the floor. Your elbow should be bent at roughly a 90-degree angle, with your forearm resting comfortably on your desk or armrest. This stable platform is essential for generating a controlled vibration. If you’re slumped over or your arm is floating in the air, you’ll waste energy, lose control, and risk injury. Get your ergonomics right before you even think about starting your first drill.
How to Jitter Click: The Step-by-Step Foundational Method

This is where the real work begins. The key to learning how to jitter click is to understand that you are not trying to click faster, but rather learning to generate and control a vibration. At first, this will feel awkward and unnatural. Your aim will be terrible. Do not worry about it. For now, our only goal is to teach your muscles this new, strange movement. We will build speed and accuracy on top of this foundation later.
Step 1: Finding Your “Jitter” – Learning to Vibrate Your Arm
First, take your hand off the mouse. Rest your arm on your desk. Now, try to tense the muscles in your forearm and bicep just enough to make your hand start shaking or vibrating. This is the “jitter.” It shouldn’t be a violent, full-body spasm. It’s a focused, high-frequency tremor.
Some people find it easier to start by making a fist and flexing hard, then slowly relaxing until the shaking starts. Others find it by trying to “flex” their wrist without actually moving it. Experiment. Feel the muscles in your arm. The goal is a steady vibration you can hold for a few seconds. This is the engine of your new clicking technique.
Step 2: The Ideal Grip – Claw vs. Palm Grip for Jittering
Your grip is critical for transferring this vibration to the mouse button. For jitter clicking, a traditional palm grip (where your entire hand rests on the mouse) is usually too restrictive. It dampens the vibration.
Most successful jitter clickers use a claw grip. Here’s how it works:
- Your palm rests on the very back of the mouse.
- Your index and middle fingers are arched up.
- Only your fingertips make contact with the main buttons.
This grip creates space and allows your finger to act like a tiny hammer, rapidly tapping the switch as your arm vibrates. It gives you the perfect balance of control and freedom of movement needed for high CPS.
Step 3: Transferring the Vibration from Arm to Finger
Now, let’s combine the first two steps. Place your hand on the mouse using the claw grip. Rest your index finger lightly on the left mouse button. Don’t press down yet.
Initiate the jitter in your arm, just as you practiced. Let that vibration travel from your forearm, through your wrist, and into your hand. Your finger should start to naturally tap the mouse button from the force of the shaking. The key here is not to consciously click. Your finger is just along for the ride. It will feel strange, like you’re not fully in control, and that’s exactly what we’re looking for right now.
Step 4: Your First Clicks – Don’t Worry About Aim… Yet
Open an online click counter or a simple program like Paint. Start your jitter. Let your finger hammer away at the button. Don’t try to move the mouse or aim at anything. Just focus on maintaining a steady vibration for 5-10 seconds.
The sound will be your best guide. You’re aiming for a consistent, fast buzzing sound. If it sounds uneven or slow, your vibration isn’t steady. Relax, take a breath, and try again. For this first stage, success isn’t a high CPS score. Success is creating that consistent, machine-gun-like clicking sound, even if it’s just for a few seconds. This is the fundamental building block of your new skill.
The Beginner’s Gauntlet: Your First 30 Days of Training Drills
Learning the jitter motion is one thing; making it a usable skill is another. This requires consistent practice. Don’t expect to be a pro overnight. The next 30 days are about building muscle memory and stamina. Dedicate just 10-15 minutes a day to these drills. Consistency is far more important than intensity. Don’t burn yourself out with a two-hour session on day one.
Drill 1: The Stamina Builder (5-Minute On/Off Intervals)
This first drill is designed to build endurance in the muscles you’re using. It’s simple but incredibly effective.
- Set a timer for 5 minutes.
- Open a CPS tester tool. A great place to start is a jitter click test for 5 seconds to get quick feedback.
- Jitter click for 10-15 seconds, focusing only on maintaining a steady vibration.
- Rest for 10-15 seconds. Completely relax your arm and hand. Shake it out.
- Repeat this “on/off” cycle for the full 5 minutes.
Don’t worry about your score. The goal here is to teach your muscles to tense and relax on command without getting overly fatigued. This prevents you from building bad, tense habits.
Drill 2: The CPS Push (Using Online CPS Testers)
After your stamina drill, it’s time to push your speed. This is where you focus on hitting a new personal best.
- Use a longer test, like a jitter click test for 10 seconds or even 30 seconds. This measures your sustained speed, not just a lucky burst.
- Perform 3-5 maximum effort attempts.
- Between each attempt, rest for at least a full minute. Let your arm recover completely.
- Your goal is to try and beat your previous day’s top score by just a little bit.
This drill is about pushing your limits. It helps your nervous system adapt to generating a faster vibration. But remember, once you feel strain or a loss of control, it’s time to stop for the day.
The Most Common Beginner Mistake and How to Fix It (My Personal Failure Story)
When I started, I made a classic mistake: I held my mouse in a death grip. I thought more pressure and more tension meant more speed. I was completely wrong. My entire arm would cramp up, my cursor would fly to the edge of the screen, and my CPS was stuck at around 8-9. I was squeezing so hard that I was actually slowing down the vibration.
The fix was counterintuitive: I had to learn to relax. Specifically, I focused on relaxing my thumb and pinky finger—the ones gripping the sides of the mouse. By loosening that grip, I allowed the mouse to vibrate more freely under my clicking finger. It instantly felt smoother, less painful, and my CPS jumped to 11 almost immediately. If you feel your hand cramping, you’re gripping too hard. Loosen up.
Tracking Your Progress: A Simple Log to Stay Motivated
Motivation is key. Get a simple notebook or a text file and track two numbers every day:
- Your average CPS during the stamina drill.
- Your highest CPS during the push drill.
Seeing those numbers slowly but surely climb is the best motivation you can ask for. It provides tangible proof that your hard work is paying off, especially on days when you feel like you’ve hit a wall.
The Elephant in the Room: Health, Safety, and Avoiding Injury

We need to have a serious talk. Jitter clicking is an intense physical activity, and if you do it incorrectly or ignore your body’s signals, you can cause real, lasting damage. The internet is full of horror stories, but many of them come from people who jumped in without any knowledge of proper ergonomics or self-care. Your gaming career shouldn’t end because of a preventable injury. This section will give you the essential knowledge to pursue speed safely.
Jitter Clicking and Carpal Tunnel: Separating Fear from Fact
The big scary term everyone throws around is Carpal Tunnel Syndrome. This is a medical condition caused by pressure on the median nerve in your wrist, leading to numbness, tingling, and weakness. Can jitter clicking cause it? The honest answer is: it’s possible, but not inevitable.
The primary risk comes from poor posture, constant tension without breaks, and ignoring pain. Jitter clicking itself isn’t the direct cause; it’s the improper application of it that creates the danger. By following ergonomic best practices—keeping your wrist straight, taking frequent breaks, and stretching—you dramatically reduce the risk. Think of it like lifting weights at the gym. Done with good form, it makes you stronger. Done with bad form, it leads to injury.
The 5 Essential Stretches Every Jitter Clicker MUST Do Before and After Gaming
Treat your practice sessions like a workout. You must warm up before and cool down after. These simple stretches take less than two minutes and can save you from weeks of pain.
- Wrist Extensor Stretch: Extend one arm in front of you, palm down. With your other hand, gently bend your wrist down, pulling your fingers toward your body. Hold for 15-20 seconds. You’ll feel a light stretch on the top of your forearm.
- Wrist Flexor Stretch: Extend your arm again, but this time with your palm facing up. Gently bend your wrist down, pulling your fingers towards the floor. Hold for 15-20 seconds to stretch the underside of your forearm.
- Finger Tendon Glides: Make a sequence of hand shapes: start with an open hand, then make a hook fist, then a full fist, then a “flat” fist (like you’re holding a book). This moves the tendons through their full range of motion.
- Prayer Stretch: Press your palms together in front of your chest. Slowly lower your hands towards your waistline until you feel a good stretch in your wrists and forearms. Hold for 20 seconds.
- Arm Shake-Out: Simply let your arms hang by your sides and gently shake them for 15-20 seconds. This promotes blood flow and helps release any lingering tension.
Red Flags: How to Know When Your Body is Telling You to Stop
Pain is not weakness leaving the body; it’s a critical warning signal. You must learn to listen to it. Stop your practice immediately if you experience any of the following:
- Sharp, shooting pain in your fingers, wrist, or arm.
- Numbness or tingling that persists after you stop playing.
- A dull ache that doesn’t go away after a few hours of rest.
- Noticeable weakness or loss of grip strength in your hand.
If you feel any of these, stop. Take a day or two off completely. If the symptoms persist, it is crucial that you consult a healthcare professional. Your long-term health is infinitely more important than a new CPS record.
From Clumsy to Controlled: Intermediate Techniques for Aiming
Having a high CPS is useless if your cursor is shaking so wildly that you can’t hit a single target. This is the great wall that separates beginners from intermediate players. Raw, uncontrolled speed is just noise. Controlled speed is a weapon. In this section, we’ll focus on turning your chaotic vibration into precise, game-winning accuracy. This is where your practice shifts from pure mechanics to real application.
The #1 Problem with Jitter Clicking: How to Reclaim Your Accuracy
The very motion that generates your clicks—the rapid vibration—is also what destroys your aim. Your mouse is shaking constantly, making small, precise movements seem impossible. The secret to overcoming this isn’t to stop the shaking, but to isolate it.
You need to learn to separate the micro-movements of jittering from the macro-movements of aiming. Your jitter should come from your forearm and wrist, creating the clicks. Your larger aim movements—like tracking an enemy or snapping to a target—should come from your elbow and shoulder. Think of your arm as having two independent systems: a high-speed engine in your forearm and a smooth steering system in your upper arm. Mastering this separation is the key to accuracy.
Case Study: How I Went From 20% to 70% Accuracy While Jittering
I vividly remember the frustration. My CPS was a solid 14, but in actual Minecraft duels, my accuracy was abysmal—around 20%. I’d land a few lucky hits, but I’d miss most of them as my opponent easily sidestepped my flailing cursor. I almost abandoned jitter clicking entirely, thinking it was only for showing off.
My breakthrough came from two changes. First, I drastically lowered my mouse sensitivity. A high DPI or sensitivity setting amplifies every tiny shake, turning a small vibration into a massive cursor movement. I cut my DPI in half, forcing me to use my whole arm to aim. You can use a tool to check your mouse DPI to get a baseline and start experimenting with lower settings. Second, I stopped trying to aim with my wrist. I locked my wrist and focused on making smooth, sweeping motions from my elbow. It felt slow and clumsy at first, but within two weeks of dedicated practice, something clicked. I was tracking targets smoothly while jittering. My accuracy shot up to over 70%, and I started winning those fights consistently.
Advanced Drills Using Aim Trainers (Aim Lab, KovaaK’s)

To build this skill, you need to practice in a controlled environment. Aim trainers are the perfect gym for your mouse control. Both Aim Lab (free on Steam) and KovaaK’s 2.0 (paid) are fantastic tools.
Here are a few types of drills to focus on:
- Tracking Scenarios: Load up a “SphereTrack” or “SmoothBot” scenario. The goal is to keep your crosshair on a moving target for as long as possible. Start by tracking without clicking. Then, try to track while actively jitter clicking. Your goal isn’t a high score at first; it’s smoothness.
- Target Switching Scenarios: Try a drill like “Tile Frenzy.” In these drills, you need to quickly move from one static target to another. Practice this by jittering on one target for a second, stopping the jitter to make a clean move to the next target, and then starting the jitter again. This builds the control to start and stop your vibration on command.
Spend 10 minutes in an aim trainer before you jump into a real game. This will warm up the specific muscle pathways needed for accurate jitter clicking and make a world of difference in your performance.
Jitter Clicking vs. The World: A Head-to-Head Comparison
Jitter clicking is powerful, but it’s not the only way to achieve a high CPS. The world of competitive gaming has developed several methods, each with its own cult following, unique benefits, and significant drawbacks. Understanding these alternatives—butterfly clicking and drag clicking—is crucial. Knowing their strengths and weaknesses will either solidify your decision to master jitter clicking or show you that a different technique might be better suited for your playstyle and your game of choice.
Jitter Clicking vs. Butterfly Clicking: Which Technique Reigns Supreme?
Butterfly clicking is another popular method for boosting your click speed. It involves rapidly alternating clicks on a single mouse button with two fingers (usually your index and middle finger). By creating a “drumming” motion, players can often achieve a CPS of 15-25.
- The Pro-Butterfly Argument: On paper, butterfly clicking can reach a higher maximum CPS than jitter clicking. Since you’re using two fingers, the physical motion is less strenuous on your arm and wrist, potentially reducing the risk of fatigue and injury.
- The Reality Check: The biggest issue with butterfly clicking is its effect on your mouse and your aim. The double-finger motion makes aiming significantly more difficult than jittering. Furthermore, it causes extreme wear on your mouse’s micro-switch and can lead to unintentional double clicks. Many players find that while their raw CPS is high, their in-game performance suffers. Some servers even ban butterfly clicking because it can be mistaken for an auto-clicker.
My Verdict: Jitter clicking is the more practical skill for combat. It offers a better balance of speed and aim, which is what actually wins fights. Butterfly clicking is impressive on a CPS test, but often less effective in a real match.
Jitter Clicking vs. Drag Clicking: Speed vs. Practicality
Drag clicking is the most extreme method of them all. It’s less of a “clicking” technique and more of a controlled glitch. It works by dragging your finger across the mouse button in a way that uses the friction of your skin to vibrate the switch, registering dozens of clicks in a single pass. A successful drag can result in a mind-boggling 30, 40, or even 100+ CPS.
- The Pro-Drag Argument: Unmatched, god-tier CPS. Nothing else even comes close. It is the method for certain tasks in Minecraft, like “speed bridging.”
- The Reality Check: Drag clicking is almost completely useless for PvP or any activity that requires aiming. It’s impossible to control your mouse while doing it. It also requires a very specific mouse with a matte surface that allows for friction (like some Roccat or Glorious models), and it wears out your mouse switches faster than any other method. You can see if your mouse is even capable of it by trying a drag click test, but don’t be surprised if it doesn’t work. Most servers ban it for competitive play.
My Verdict: Drag clicking is a highly specialized, niche tool. It is not a replacement for a primary clicking method. Think of it as a trick shot, while jitter clicking is your reliable, all-purpose rifle.
Comparison Table: Which Clicking Method is Best for Your Game?

| Feature | Jitter Clicking | Butterfly Clicking | Drag Clicking |
| Max Potential CPS | 12-18 CPS | 15-25 CPS | 30-100+ CPS |
| Aiming Difficulty | High | Very High | Nearly Impossible |
| Learning Curve | Steep | Moderate | Very Steep |
| Mouse Wear & Tear | Low to Moderate | High | Extremely High |
| Server Legality | Almost Always Allowed | Sometimes Banned | Almost Always Banned |
| Best For | Minecraft PvP, FPS Games | CPS Tests, Niche Uses | Speed Bridging, Memes |
Pro-Level Optimization: Fine-Tuning Your Settings and Mindset
Reaching the advanced level of jitter clicking means going beyond raw physical skill. At this point, you’ve built the muscle memory and the control. Now, the biggest gains come from optimizing your software settings and honing your mental game. These small adjustments can be the difference between a good player and a great one. This is about sharpening your blade to a razor’s edge.
The Perfect DPI & Sensitivity Settings for Jitter Clicking
As we discussed in the aiming section, a lower sensitivity is generally better for controlling the jitter. But what is the perfect setting? There is no magic number, but there is a reliable method to find yours. This is often called finding your “perfect 360.”
- Start with a Baseline: Set your mouse to a common DPI like 800. If you don’t know your current setting, you can use a mouse DPI test to find out.
- The 360 Test: Go into a practice range in your favorite game. Place your mouse on one side of your mousepad. Now, move the mouse all the way to the other side. Adjust your in-game sensitivity so that this single, full swipe makes your character do exactly one 360-degree turn.
- Fine-Tune from There: This is your starting point. From here, make small adjustments. If your aim feels too shaky and hard to control, lower the sensitivity slightly. If you feel like you can’t turn fast enough to react, raise it a bit. The goal is to find the lowest sensitivity you can comfortably play with without sacrificing your ability to react to threats around you.
Software Secrets: Using Mouse Software to Your Advantage
Modern gaming mice from brands like Logitech, Razer, and SteelSeries come with powerful software suites (G Hub, Synapse, etc.). Most players ignore them, which is a huge mistake. Here are two settings you need to master:
- Polling Rate: This is how often your mouse reports its position to your computer, measured in Hz. For gaming, this should always be set to the highest possible value, usually 1000Hz. This means your mouse is communicating every 1 millisecond, providing the smoothest and most responsive tracking. You can verify this with a polling rate checker to ensure it’s set up correctly. A lower polling rate can feel laggy and unresponsive.
- Surface Tuning: Many software suites have a feature that lets you calibrate the mouse sensor to your specific mousepad. This optimizes the sensor’s tracking ability for that particular surface, reducing the chance of cursor spin-outs or inaccuracies during fast movements. It only takes a minute to do and can make a noticeable difference in consistency.
The Mental Game: How to Stay Consistent When the Pressure is On
You can have the best skills and the perfect settings, but if you crumble under pressure, you’ll still lose. Jitter clicking requires a relaxed arm and a focused mind. When you get nervous in a crucial fight, your natural instinct is to tense up—the exact opposite of what you need.
The key is to practice mindfulness and control your adrenaline. Before a competitive match, take a few deep breaths. Consciously tell yourself to relax your grip and your shoulder. Remind yourself that you’ve done the drills hundreds of times. Trust your muscle memory. I used to lose critical fights because I’d get panicked and my jitter would become a spastic, uncontrolled mess. I learned to focus on my breathing during intense moments. A slow, controlled exhale can physically force your body to relax, steadying your hand and allowing your training to take over. Your mindset is the final piece of the performance puzzle.
Frequently Asked Questions (FAQ)
You’ve learned the theory, the drills, and the optimization secrets. Still, you probably have a few nagging questions. Let’s clear them up right now with direct, no-nonsense answers.
How long does it take to learn jitter clicking?
Can jitter clicking damage my gaming mouse?
What is a good CPS for jitter clicking?
Is jitter clicking banned on servers like Hypixel?
Can I jitter click with a laptop trackpad?
My arm hurts when I try to jitter click, what am I doing wrong?
Conclusion
You’ve made it through the entire training manual. We’ve gone from the initial, awkward muscle tremor to a deep understanding of the gear, safety protocols, aiming mechanics, and pro-level settings that define elite jitter clicking. You now know that incredible speed isn’t a secret gift; it’s a science and a skill built through dedicated, intelligent practice. The journey from a frustrated beginner to a confident pro isn’t about brute force. It’s about control, consistency, and listening to your body. You now have the complete roadmap.
Remember that player on the bridge from the beginning? The one whose impossibly fast clicks ended your game? That doesn’t have to be you anymore. The frustration of being outpaced is now a problem you have the tools to solve. The next time you’re in that high-stakes duel, the sound of a hornet’s nest won’t be coming from your opponent’s headset—it will be coming from yours. Your very next step isn’t to become a master overnight. It’s to open up a click tester and begin your first 5-minute stamina drill. Start building the foundation today.
What’s the first game you’re going to dominate with your new clicking speed?

Hello, I’m John Harbour, a software developer passionate about creating innovative and accessible AI tools. As the creator of cps-checker.com, I enjoy building useful software and writing blogs to help people get the most out of my creations.